AeroRetro: Build -A- Plane 3D Tutorial: Part 1 >1 2 3 4 5 6 7 8 9 10 11 12 > Part 2
Ready? Good, let's rock!
Start Part Two:
I bet your plane is looking great but we can do even more to make it even better! This time we will be finishing our model off by adding a cockpit and canopy, control surfaces and any other bits we might have missed.....let's GO!!
Step 12:
So last time, we finished up our basic shape, let's start off part two by quickly adding a few minor details. Again these items can be modeled once and then mirrored. No need to make it difficult ;-)
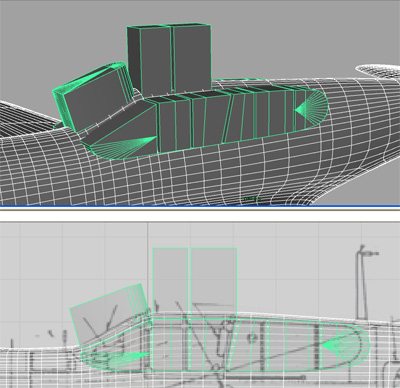
As you can see below, I've added the machine guns, landing gear blister and intake surfaces Like most shapes, primitives were used, extruded and shaped....just like everything else....I hope you are starting to notice a pattern here =) The two shapes used were the sphere and cylinder. I used the default settings for divisions as I wont be smoothing these items. If your are concerned about your poly count....which is really how many tri's you have ...not quads, you could always use fewer divisions and apply a edge soften for these smaller bits.
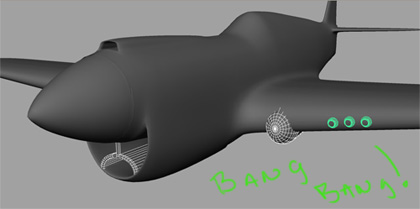
The openings for the air scoops were simply extruded inward then deleted.
Step 13:
Oh boy the canopy...good times huh? =) Ok, it's not as scary as it looks. There are a few different ways to do this, the method really depends on your project needs. The method described below is a down and dirty...get'er done method using boolean cuts.
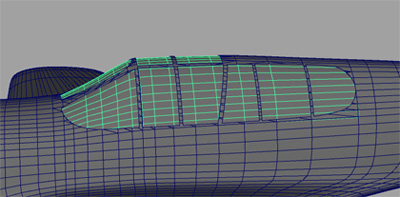
To start, create some objects in the shape of the glass bits or cutouts. Each bit is a separate object which is then combined into one object.

Nothing fancy at this point but you should see how the shapes match the canopy cut outs. Also you will notice a cylinder to the bottom left...it will be used for the wheel well. In general I try to do all my booleans at the same time...call it habit but it just seems to produce better results.
Step 14:
Before continuing , make a copy of your mesh and hide it for now and then go ahead and make your cuts to your original mesh.
....and BAM! You should end up with something like the following.
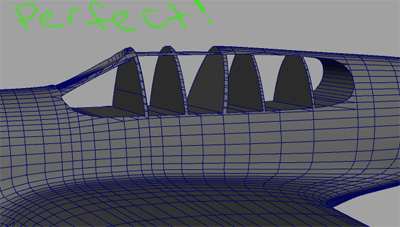
Not too bad huh? Go ahead and remove the faces that are not needed...it should be pretty obvious.
Step 15:
Ok, remember the copy you made? Great! Go ahead and display it. Next, you will want to select the faces that roughly match the area of the canopy.
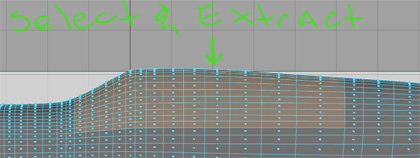
Sweet, now extract those faces from your mesh and delete the rest.
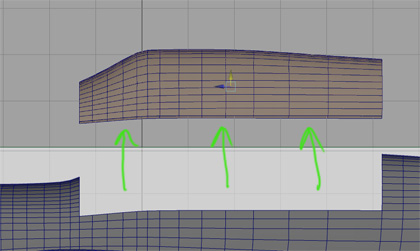
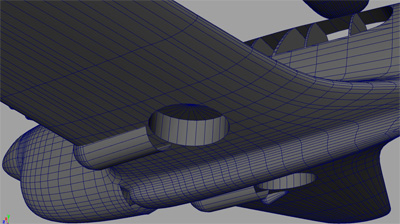
Next, display your original mesh again and place the newly extracted faces back into their original position and simply scale them down just a little bit so they appear inside of your plane. Like this.
You can apply a transparent shader to your canopy glass now if you'd like.
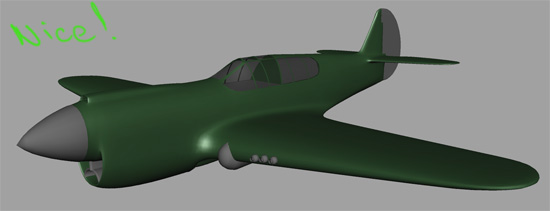
Perfect! I knew it'd work out =) Like I said it's not the only way but it's quick and painless non the less.
< BACK .. NEXT >